


Unreal 4.25
Over the past six weeks, I have been involved with a fellowship program at Epic Games to do a deep dive into Unreal Engine 4.25 and better understand its important role as a tool for pre-production, production and post-production. And with that comes reviews of not only Unreal Engine 4.25, but a handful of tools that extend the functionality.
But first, let’s start with the base software: Unreal Engine 4.25 — as of this writing 4.25.1.
The big news about the latest release of Unreal Engine has to be the support for real-time ray-tracing, which is bolstered by the RTX technology in the Nvidia cards. Now, “real-time” is a factor of the complexity of the scene, its materials and its post-processes. You can quickly take down the scene to sub-24 fps if you aren’t cognizant of the variables. But, when set up properly, you have proper soft shadows, reflections and refractions — without a need to bake lighting — in real time. This delivers a level of realism that has been a hurdle for quite some time. And now that the hardware is readily available, the software is rising to fill that potential.
This realism ties directly into the rise of actually shooting LCD screens in camera as backgrounds behind actors — not only providing a virtual set extension, but contributing to lighting and reflections on the actors and props. The results speak for themselves, being a key part of the production workflow in The Mandalorian series. And it’s not just larger productions that are using them: a whole subculture of filmmakers are beginning to put together homegrown systems. Epic Games is supporting the movement effectively by creating tools to tether the VCam (virtual camera) to be driven by an iPad, or facial motion-capture feeding character performances in real time through your iPhone.
Niagara has been upgraded to a production-ready particle system after living in an experimental stage and then beta for quite a while. Its UI has been overhauled with a birds-eye view of the system and a consistent, color-coded system for clarity. The particle systems live in containers at this level, but functions can be clicked on to dive deeper into a Blueprint-style node graph. But the deeper change has been within the particles themselves and the attributes. This is nothing new to Houdini users as particle attributes are fundamental to controlling complex particle systems.
Also upgraded to “production-ready” in 4.25 is the Chaos Destruction system, which is Unreal’s flavor of dynamics. It supports general collisions and dynamics, but in addition, you have destruction and fracturing, cloth and hair, ragdolls and all kinds of physics goodness. All of which is accessible through Blueprints for customization.
To go along with the ray-tracing features, the new shader systems are available like thin transparency, anisotropic features and updates to the clear coat.
But, what is exciting to me as a filmmaker is the ability to put scenes together in Sequencer (Unreal’s equivalent to an Avid or Premiere timeline), and then render out to ultra-high resolutions with motion blur, depth of field and all the bells and whistles, with the bottleneck being the time it takes to the write the frames to disk, rather than the calculation of the frame itself. I’m even planning on testing some actual production shots using Unreal to see what I can and cannot get away with. This release — and this recent fellowship — may have pushed my career into an entirely new vector!
Website: unrealengine.com
Brushify
While working in Unreal Engine, I discovered the vast repository of assets found in the Unreal Marketplace. One of the standout packages (or sets of packages) is found under Brushify. Created by Joe Garth, a decade-long veteran of game environment development, these packs are specifically designed to be able to quickly develop and audition complex environments — exteriors, specifically.
Unreal Marketplace packs frequently come with a set of textured geometry that are used to populate your game level or scene, which is great. I’d rather buy a set of pre-textured oil barrels for $5 rather than model and texture them myself. But while the Brushify packs do come with some geo, the power is in the toolsets, maps and dynamic shading systems therein.
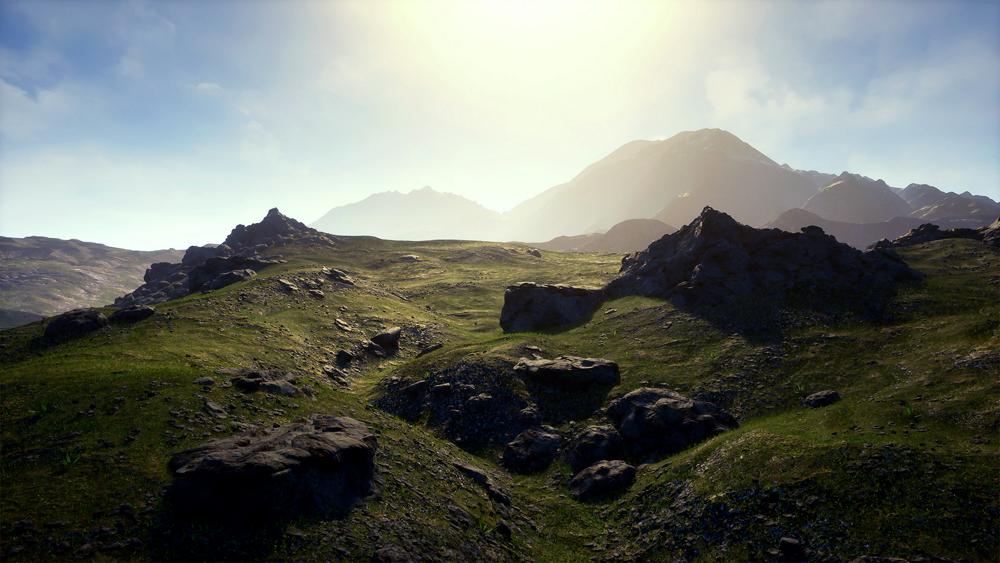
I was able to layout a hilly forest with blowing trees using the Unreal internal Landscape tools to sculpt the ground. I used the Foliage tool to scatter trees and bushes. But it was the materials in the Forest and Natural Roads pack that let me lay down layers of grass, dirt, puddles and rocks quickly and artistically; either through painting with brushes or controlling things via some curves. And it was the materials that dynamically changed from grass to rock as I changed my landscape after the fact to make some hills higher and more steep. I mean, it’s not akin to sorcery… I do know about how Unreal works with height maps and slope angle to be able to control materials and object distribution. But the Brushify tools are doing everything under the hood, and I don’t have to figure that out. I just create.
Furthermore, because Garth comes from a gaming background, the tools are designed to be agile and lightweight, and exceedingly customizable. And general hurdles have solutions built in — for instance, being able to break up texture tiling over vast areas via layers of different noises and LODs, or using height maps generated from real geographic data (or from World Creator; see other review) to allow you to drop in natural Earth (or Moon) structured with a click of the Wacom pen.
To compound the usefulness of Brushify packs, Garth has created a complete library of training. Each pack comes with its own tutorial on how to use the specific features. But there are a bunch of bootcamps and deep dives into literally creating entire environments from scratch. That’s hours and hours of training.
The packs include: Urban Buildings, Desert Mountains, Country Roads, Volcanos, Mountains, Grasslands, Forests, Cliffs, the Moon!, Canyons, Moorlands, Dunes, the Arctic and Tropical stuff. All in, you’d be out around $450 — but maybe you only need a Volcano!? $20. And spending $20 to have a volcano within the hour rather than spending a week modeling and texturing? It’s a no brainer. Plus, Joe Garth is taking his knowledge and experience and making your life better. The least you can do is to support him!
Website: Brushify.io
Price: Varies ($9.99 to $39.99 per shader or pack)
World Creator 2
Our Unreal journey continues to World Creator 2 — which I learned about from Brushify’s Joe Garth. Now, World Creator 2 is not Unreal exclusive. In fact, it is a standalone terrain and environment generator that happens to have a bridge plugin to migrate data into the Unreal (and Unity) game engines. But, the data is also perfect for traditional DCCs like Maya, Houdini, etc.
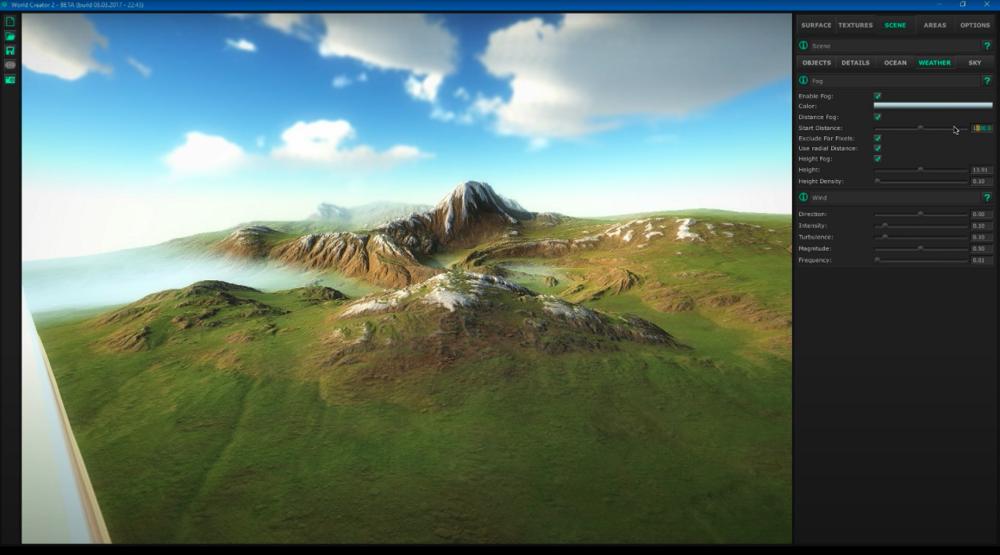
So, what does it do, exactly? World Creator is meant to create worlds. (Duh.) It has a sophisticated workflow of layering systems of sculpting and filtering to create extremely complex terrains. The idea is that you get your general form of hills, valleys, plains and mountains first. This can be done with a grid system of controllers that you lift and push down to mold the surface. And you can use different brushes to sculpt in specific detail. Once you have the general idea, you begin to apply filters to the geometry to create erosion patterns. But the complexity lies in not only the ability to stack filters on top of each other (the order of the stack matters), but there are sliders to allow you to affect how granular you want the detail to be.
In my test case, I grabbed some USGS data from the Internet for an area in Santa Clarita, Calif. The resolution was 1 pixel = 1 meter. Not great, but could be worse. It’s fairly typical of what you can find if you aren’t a government official. But the height maps make for very mushy results. Certainly way too low-res for something your character might be running around on. So, this was my base layer. Adding filters on top of this brought in details that were otherwise not there. And if I were a real stickler for geologic veracity, I could have used World Creator’s sandbox simulation to do natural rain and water erosion with sedimentary buildup to wear away the Santa Clarita mountains.
Once I had the terrain, World Builder gave me texturing tools that could be controlled with “heat maps,” which, loosely translated, are alpha channels that indicate elevation, slope angles, or even customized areas that can determine individual biomes. All of this could be populated with trees, bushes, grass or geometry that I could import. More importantly, I could render pretty pictures, right from World Creator itself.
However, I needed this to come into my Unreal level. World Creator exports the final height map to be imported into UE (at insane resolutions if you are crazy enough and your workstation is powerful enough). The textures and the heatmaps will come along, and you can use those to drive the materials in Unreal.
One last thing, I have to admit that I’m glossing over the power of this software. It does much, much more, and it’s very smart and non-destructive about it. There may be arguments that Houdini has these same types of tools and features, and you could go to Unreal through Houdini Engine. But World Creator 2 is $289 and, for me, that’s where the debate ends.
Website: world-creator.com
Price: (Windows: $149, $289; Mac: $149, $249; Bundle: $189, $389)

Chaos Group’s V-Ray 5
This last review takes us out of the Unreal space. And while V-Ray is available for Unreal Engine, version 5 is currently, as of this writing, available initially in its hometown of Autodesk’s 3ds Max.
This latest release, like most, has a laundry list of updates. But the most impactful, in my eyes, is the ability to adjust and mix lights from a render directly in the Virtual Frame Buffer. In the distant past, lighting artists would render out individual lights, comp them in After Effects or Shake or Nuke, and then try to balance them. Some of the more sophisticated pipelines would allow you to push those changes back into the 3D lights so when you rendered everything together it would look like the comp. Then came raytracing and rendered elements, and the whole world changed — lights could be manipulated solely in the comp through one render, and it wouldn’t go back to CG.
In V-Ray 5, both of these techniques are used, and then some. The Render Elements are rendered during the primary pass. Those can then be accessed and modified within the frame buffer itself to not only balance the lights — but you can change the lighting design if you want. This is great for auditioning looks for a director. The result can then be pushed out to layers for the compositor. Or you can push the data back to the scene, which will adjust the values of the lights to match your look. Which is great if you have to propagate a look across many shots.
This process is extended into Layered Compositing, which gives you not only the control of the elements, but post-processing features like color balance, color curves, exposure and lens effects; saving you a round trip to a compositor or image processing software like Photoshop. Many of these were available in earlier versions of V-Ray, but only on the entire image.
I should mention that the V-Ray material library is greatly expanded — so much so that I had to walk away for a while during installation. And so much so that they made a new Asset Browser to manage them. Along with the vast array of 500 material presets, some new features were added. A coat layer updates what we would normally have done using a blend to make is look like a clear surface on top of another. A sheen layer was put in for surfaces like velvet. In the textures department, we have some tools to randomize UVs, hues, gamma, material and object ID, all dirtied up with a stochastic texture to break up repeated patterns in tiled textures. Furthermore, the V-Ray Dirt texture extends its functionality with the ability to add streaks to emulate dirt and sediment dripping from cracks.
There are lots of cool things to get you up and running quickly. But at the risk of repeating the importance of the LightMix — that feature will alter the way you work. For the better.
Website: Chaosgroup.com/V-Ray/3ds-max
Price: $80 (per month), $470 (per year), $1,180 (perpetual)
Todd Sheridan Perry is an award-winning VFX supervisor and digital artist whose credits include Black Panther, Avengers: Age of Ultron and The Christmas Chronicles. You can reach him at todd@teaspoonvfx.com.
