


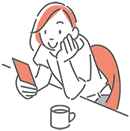
Boords
boords.com
I draw storyboards. I draw them a lot.
I draw them for visual effects. I draw them for short films. I draw them for animation projects. I even draw them for prototyping software and pipeline tools.
I’ve used multiple types of storyboarding programs, but a lot of them might be a little more robust than you need — and they still require you to fall back on more traditional methods when it comes to managing and reviewing boards with clients and teams.
Boords is an online subscription service that sort of puts Storyboard Pro and BaseCamp into the same room. It’s not meant to make you a better storyboard artist, but rather to organize and creatively collaborate with others on and present your project to.
The interface is light and friendly, designed for ease of use. It does have drawing tools within the package, but for my own style, I’d prefer to work via the option of uploading previously created boards (either digitally or — God forbid! — with pencil and paper). Then keep the drawing tools more for team and client annotations and notes. And on that note it would be fantastic to have notes and drawing tools in the same interface for ease of annotations. Layers would be cool, too.
But, I’m getting a little ahead of myself.
Once you have a version of the boards you and your team love, you can share the boards either through a URL link or you can export a presentation PDF that you can tailor design for your company.
Overall, I like the idea, design and execution. I have a feeling that they have plans to bolster the toolset as they get feedback and grow. And ranging from $12 per month for occasional boarders and upwards as you add more collaborators, the features are definitely worth it.

Hewlett-Packard ZBook 15 & 17
hp.com
The Hewlett-Packard ZBook series has been a popular choice for a broad range of industries. NASA decided on the 15-inch ZBook to send up to the International Space Station and, if anyone is more worried about reliability, portability and weight than NASA, I don’t know who that is. But we aren’t launching things into space. We’re just making art. However, sometimes our art needs a bit more firepower than the standard laptop.
HP released the G4 series of their Zbook Mobile Workstation in all of its flavors: 14u/15u (the thin guys), Studio (the all-around guy), and the 15-inch and 17-inch full-performance ZBooks (the workhorses). We’ll focus on the last two.
One great thing about the new G4 line is that everything internally has been leveled up, but the profile of the body has remained the same. The CPUs are seventh generation Intel and Xeon processors and the GPUs can now either be AMD RadeonPro WX4170 or NVIDIA M1200, up to a whopping P5000 with 16GB of RAM (for the 17-inch ZBook). And both machines can be brought up to 64GB of DDR4 RAM. All-in-all, enough power to provide real-time VR demos.
Like I mentioned, the profile of the body hasn’t changed and has maintained a surface that almost feels soft. But there have been some body alterations. HP has incorporated tool-less access for the battery and the hard drives, which makes swapping disks quick and easy. And with four drive ports — a couple M.2s and a couple 2.5-inch slots you can pack in 4 TBs into the 17-inch and 3 TB for the 15-inch — two slots could be taken up by 1 TB TurboDrives for that extra boost of drive-access speed. And as far as the battery goes, HP has made it so the 16-hour battery life is quickly accessible. They have somehow made it so you can have a 50 percent charge within a half hour!
HP has also kicked up the security on the ZBooks. On top of fingerprint and multiple-stage logins, there is something called SureStart, which is a BIOS level security. It has been getting more popular for hackers and purveyors of malware to alter the actual BIOS, affecting things on the system even before the operating system can boot up. So HP has put in a redundant BIOS system, which monitors the boot time BIOS for unauthorized changes in real time, and can be used to flush and refresh the primary BIOS — even while retaining user preference.
I really love these machines. They run more expensive than the run-of-the-mill laptops that you use for your email and browsing. But that’s because they are designed for more. It’s made for those who need a substantial amount of power while on the run or working away from their primary workstation. Yes, I want to be able to run Houdini sims on a laptop. Who wouldn’t!

MoSketch
www.mokastudio.com
I’m always enthralled by innovations taking place in disciplines that have been doing things in particular ways for so long. And I say “so long” in a way that implies that 3D animation has been around for SO LONG. It hasn’t. So, that said, there are always places that can be made more efficient. One of those places is in how character animation is accomplished.
If you are a working animator and have had the chance to work with someone who is coming from the 2D animation of yore — like Glen Keane, for example — you will be familiar with them drawing on your frames to indicate silhouettes and action lines. Well, what if you could kinda animate like that?
I can only imagine that that is what was going through the heads of the developers at Moka Studios when they conceived MoSketch, their character animation tool that attempts to bring some fluidity to the process of 3D animation.
See, traditionally, we go through and — with a combination of forward and inverse kinematics — we pose our characters at certain points in time. But frequently, that requires tweaking a whole bunch of bones or controllers, and it doesn’t necessarily feel “natural.”
MoSketch allows you to select a chain of bones in your character and then draw the pose you’d like those bones to form. You click on the parent bone and use hotkeys to adjust how many bones you are influencing, and then sketch the path you want the bones to follow. Keyframe those positions and then refine — either through additional sketching, or you can switch to using traditional FK/IK translations by simply clicking the parent bones and holding — which gives you a standard transform handle.
The up-down influence of the bones is also handy, because you can either go from the base “up” like from the shoulder to the elbow, so you just bend the arm. But you can reduce influence from the ends down. So, you could rotate the elbow and keep your shoulder and your fingers locked into place. The IK solutions are, interestingly enough, accelerated using the GPU.
Once you have keyframes, you can switch to your curve editor, which appears as a HUD using the entire screen real estate, which I haven’t see much of except for another unique animation tool called Nukeygara. It allows you to watch the animation changes behind the curves as you alter the key positions on the curve.
MoSketch does have the ability to export your animation back out through FBX files, so that you can apply them back onto the original skeleton of your character. So, in theory, you could use the animation in a workflow outside of MoSketch, but in my experience, the complexity of full-blown production rigs climb into the stratosphere. So it’s hard to predict how it could work in larger pipelines.
That said, I love the feel, I love the concept, and I love how quickly you can block out performances. I see big things happening for it if there was some way the motion could be embedded into your standard animation packages.

PSOFT Pencil+ 4
www.psoft.co.jp
Nonphotorealistic renderers have been around for as long as we’ve been trying to take 3D objects and smash them back into 2D space, in an attempt to make the artwork look “traditional.” And since we started, those renderers just keeping getting better and more robust.
PSOFT Pencil+4, as a plugin for 3ds Max is one of those options. And it’s a kind of exciting option considering that this is its first upgrade in seven years. And what have they been doing in that time?
Well, for starters then integrated the render tool set to work with Max’s Nitrous render, for real-time results at near final quality, with not just flat cel-shaded like rendering, but also calculating lights and shadows.
And that Max integration doesn’t stop there. The interface design has been revisited to incorporate the toolset into the UX of Max itself, allowing for a much easier transition into using the new tool.
And to maintain the theme of Max integration, PSOFT supports Max’s XRef system, allowing you to not only populate scenes with tons of objects, but to take advantage of being able to swap out a model for another model — without looks your drawing settings.
PSOFT deals with material interpenetration so that you get shapes that look like they appear in front of others. Not such a big deal when rendering with a photorealistic renderer. But nonphotorealistic renderers have to contend with outline of shapes and contours and how to maintain a consistency. These interpenetrations can frequently lead to unnatural looking renderers.
Part of that issue is resolved by new edge-detection algorithms that look to see how internal and outer edges are working in 3D space, and how best to present them.
But the accuracy and rigidity of the 3D world isn’t something you want all the time. You are trying to create a different aesthetic after all. So PSOFT offers some unique object modifiers to deform, bend and exaggerate the model beyond what you would normally expect — even further attempting to break that tell-tale tie with CG renders.
Oh! And PSOFT Pencil+ is now multi-threaded, providing exponentially faster renders than before. And who doesn’t want that?
It sells for 60,480 yen, which is roughly $550. Not a super cheap plug-in, but not the most expensive either. And if NPR is your jam, you may want to check it out.

Rebelle2
www.escapemotions.com
Sometimes Photoshop just isn’t what you need. And that’s kinda saying a lot since Photoshop is the de facto standard for creating and manipulating imagery. But sometimes you want to be a little more creative. Sometimes you yearn for painting with physical paint.
Rebelle 2 provides these things (to an extent), through its system of fluid-based brushes, paints and canvases. Compounding on the initial watercolor engine that was part of Rebelle’s first outing, additional brushes and mediums bring a level of realism that just feels real. You can select traditional watercolors, or maybe acrylics are your interest. Or maybe you do want to go the wet paint route — you can choose pastels, chalk and other dry medium. You can even wet down the canvas or dry areas. Each variation on the wetness creates different responses in the medium, and give you different results.
Rebelle 2 has added a bunch of new brushes to the kit, and the ability to combine features and save brand new custom brushes. Each of them has the ability to be accelerated through the GPU.
Additionally, you have a set of stencils that react to both the brushes and the canvas to give you an interesting interactive experience as you wet down a canvas through the stencil and see how the paints beneath begin to respond.
Rebelle 2 does support PSD files from Photoshop, so you can move your files back and forth without having to flatten the artwork before moving. Top that with speed optimizations, multitouch options for tablets, and a price tag under $100, and Rebelle 2 is a great artistic tool for professional and hobbyist a like.

Terragen 4.1
planetside.co.uk
Planetside Software released Terragen 4.0 last October, so I’m a bit slow on the uptake. However, with a point upgrade to 4.1, I felt it was an opportune moment to hit on some of the advances that happened from TG3 to TG4.
First on the list is speed and responsiveness. TG4 takes advantage of Intel’s Embree ray-tracing core to drive its new progressive ray-trace preview. Instead of the traditional micropoly buildup, we can a quick pixelated version of our view with all of the bells and whistles activated (if you like), providing immediate feedback for color and composition decisions. The longer you let the frame cook, the more detail is rendered. This provides fast iterations as you tweak lighting, shaders, cameras, etc.
But, then, when you have something you like and hit render, everything under the hood has been optimized to give you substantial speed improvements over TG3 — even taking into consideration that more complex math is at play.
New multi-scatter cloud algorithms have been implemented for more realistic light calculations with and around cloud systems. These are controlled by parameters in the atmosphere nodes, and can easily be setup with a quick set of presets for reality-based cloud systems like cirrus and stratocumulus and other clouds with sciency names. Plus, like many other presets, you can purchase cloud preset packs from sources like www.lucbianco.fr
To bring the atmosphere to an even higher level than with simply pretty clouds, there is the incorporation of light absorption through ozone. It may sound like an insubstantial thing when it fits into one sentence. But ozone and how it affects sunlight is what makes everything in the world look like it does — and when you’re in the business of creating worlds, it’s kind of a thing.
The camera has received a few updates as far as lens effects go. It’s not so much improvements on the scenes themselves as much as how we perceive those scenes through the camera lens. What’s great is that the post effects are taking information from the high dynamic range that Terragen is generating in its renders and applying the post effects to that — which takes into consideration the light source, specular reflectivity, atmospheric scattering, color and occlusion (like when the sun move behind clouds, mountains, or tree leaves.)
Shaders have been added and current ones improved upon, and all of them are incorporated into the powerful node-based system that drives all of Terragen.
For the 4.1 upgrade, Planetside is throwing in some parameters for your EXR output so you can save 16-bit or 32-bit files. Some new shaders are being incorporated. Some interface and naming tweaks. But most of the heavy lifting has been going into the cloud systems and atmosphere to optimize quality and render times.
Terragen and always has been super powerful. The workflow is a bit different than other 3D programs, so it has a steeper learning curve. It’s also a bit pipeline unfriendly. Moving things out of Terragen into other packages is less than kind. However, that said, a great deal of the realism of Terragen lies in the renderer — and if you move your stuff out to another program? Well, you kinda lose that.
For future upgrades, I would love to see some support for OpenVDB — both import and export.